PaySegueBeta

The simplest way to send invoices

Create and share professional invoices without turning billing into a second job.

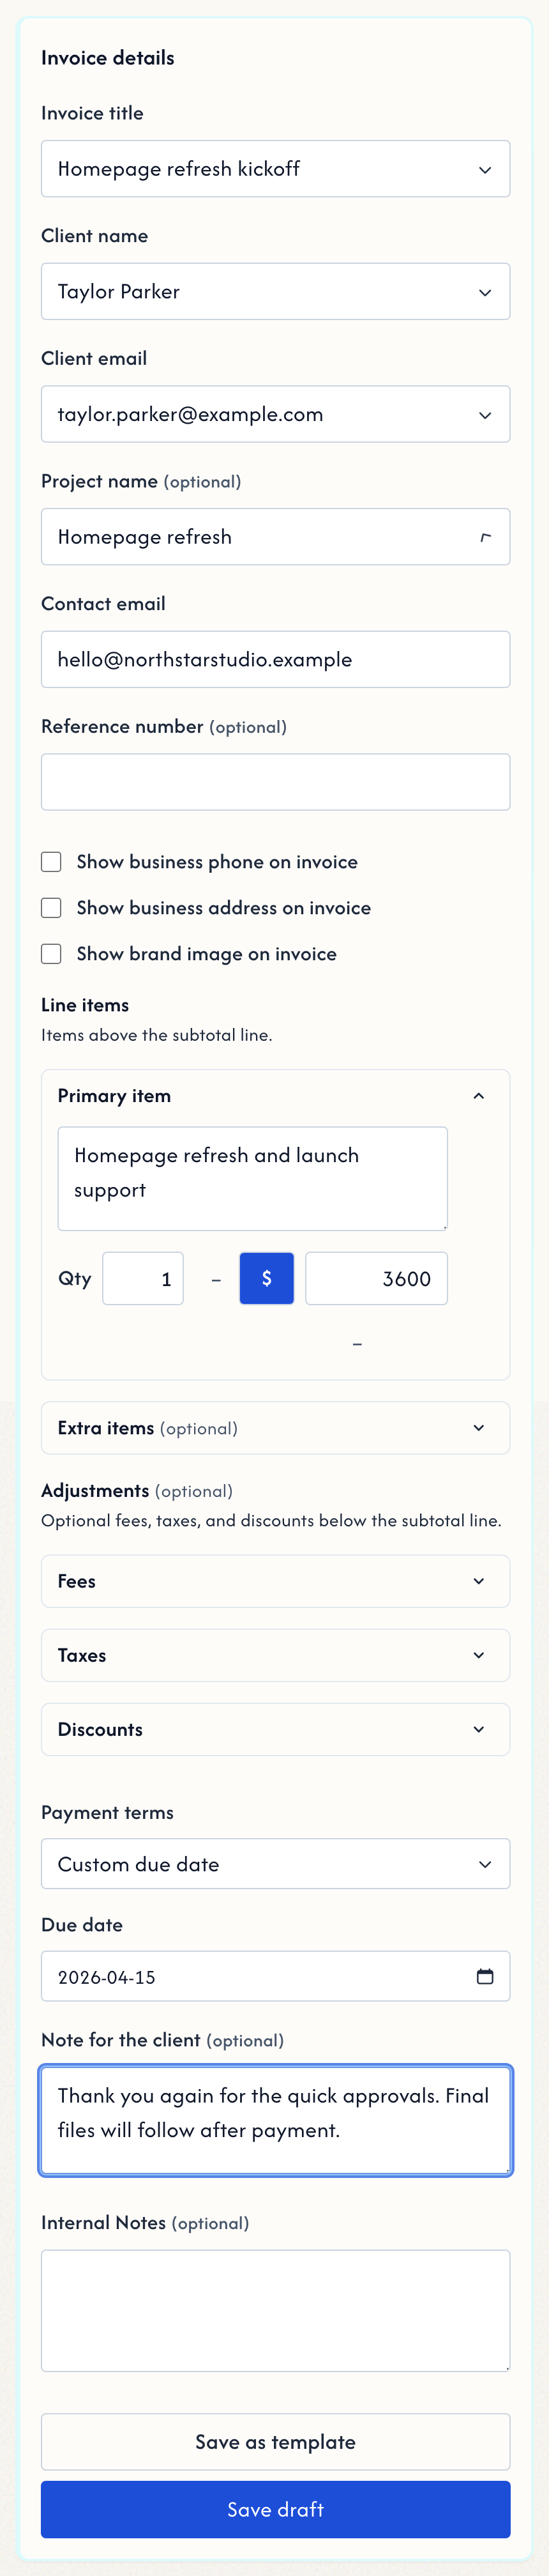
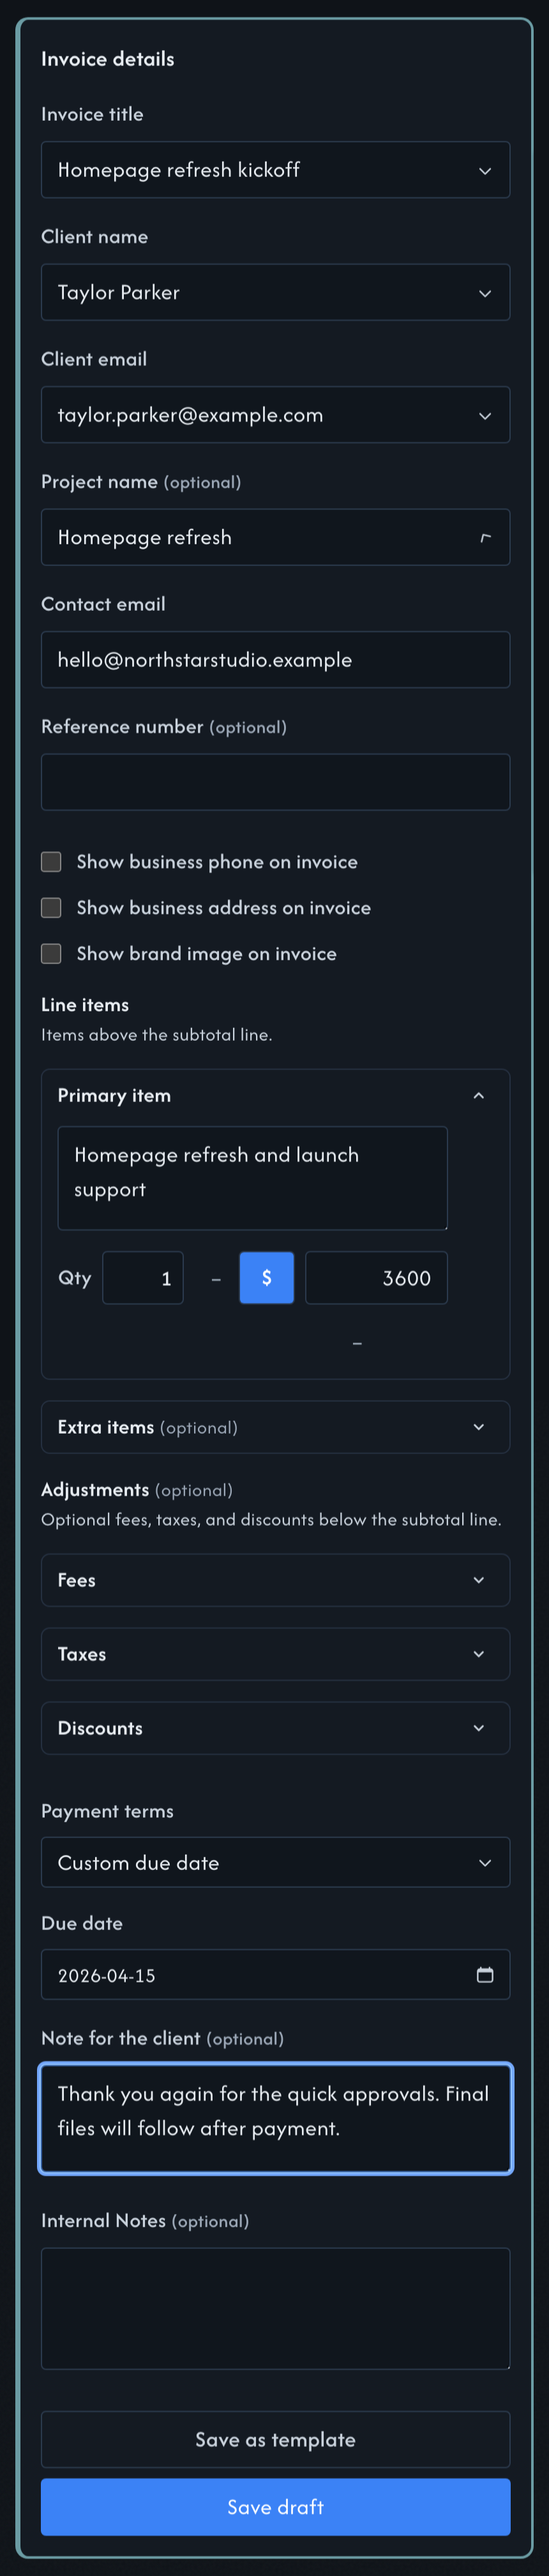
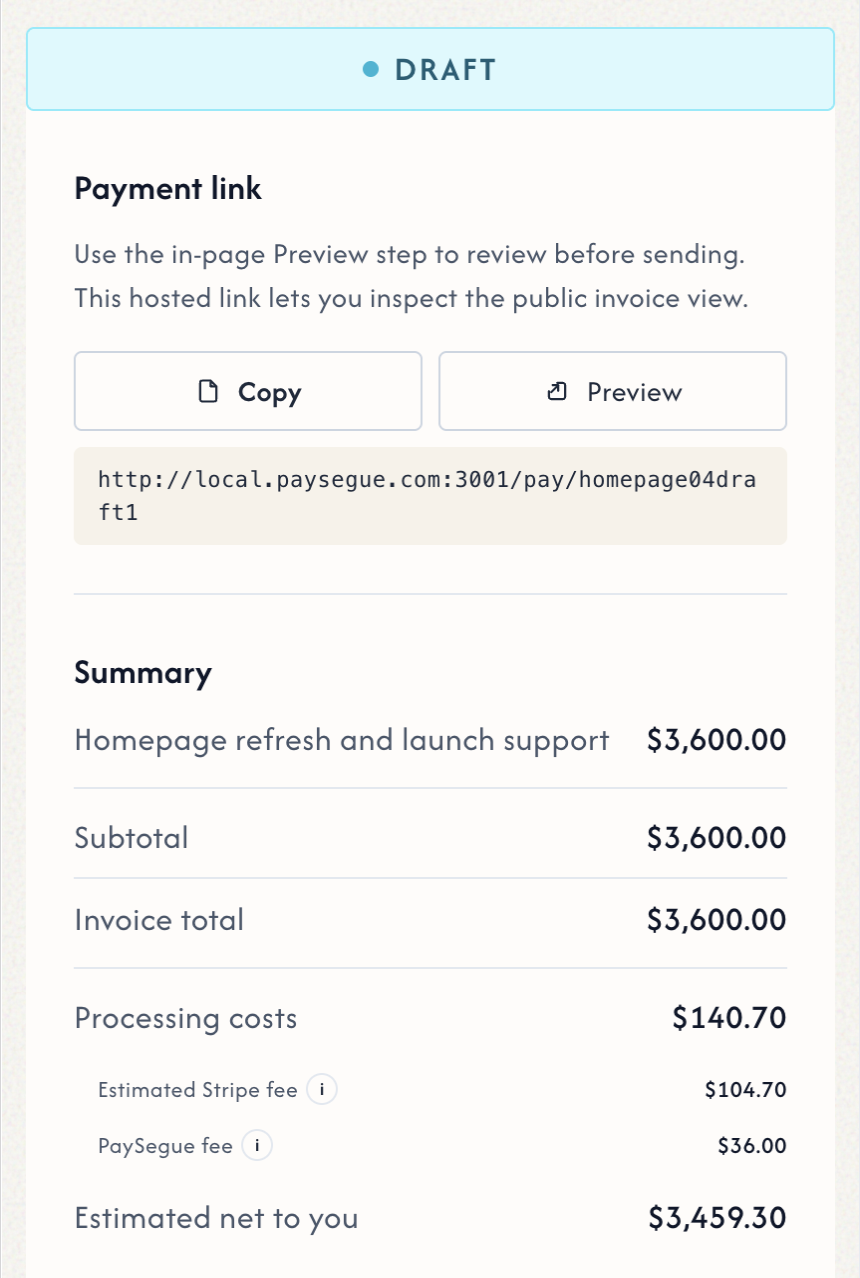
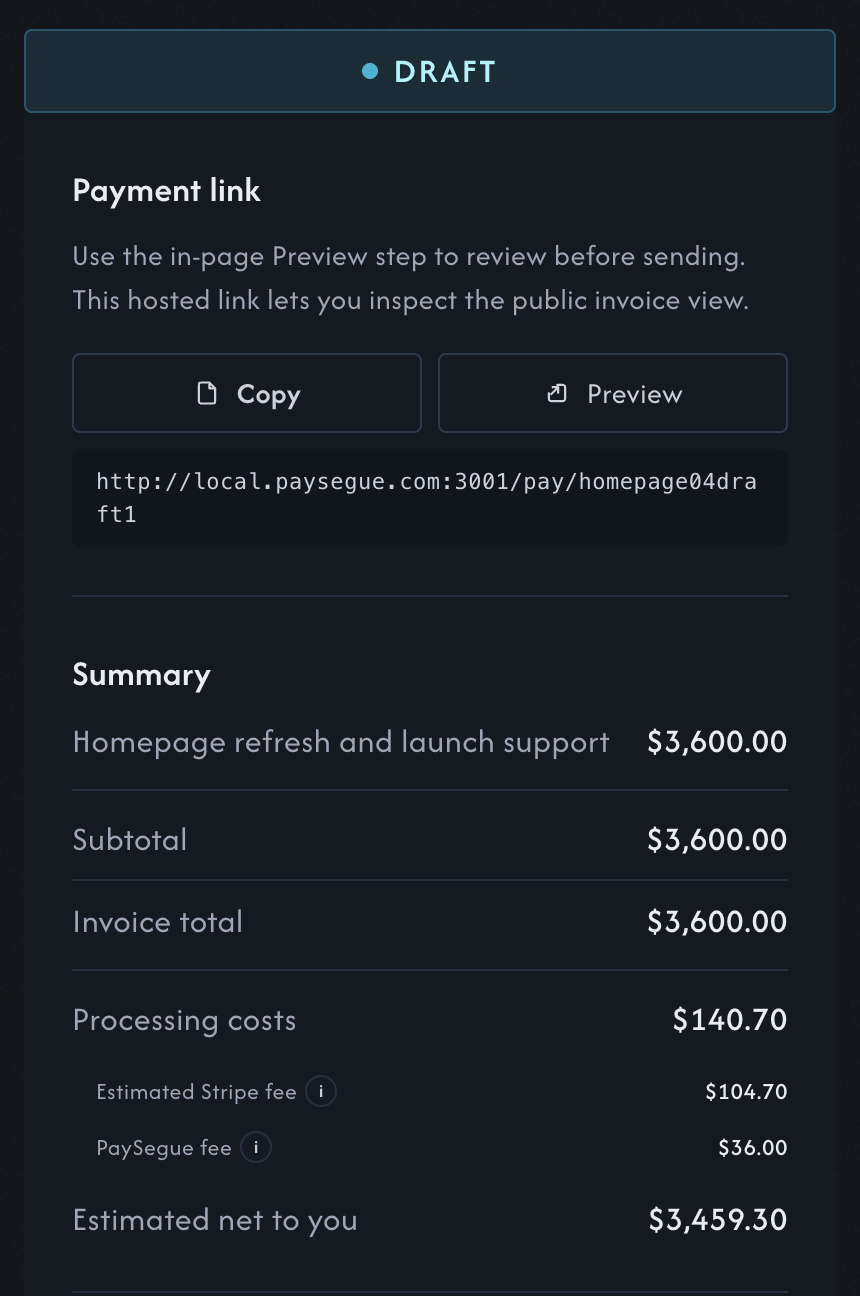
PaySegue is built for service businesses and independent professionals who want a lighter billing workflow. Share a payment link, let your client pay through secure checkout, and keep the status trail clear from sent to paid.

Creating an account is free. Paid invoices cost 1% plus card processing fees, with a $2.65 minimum per paid invoice.

Learn how it works

The next thing most people want to know is what actually happens from signup to payout? The walkthrough below shows the full workflow.

Create your PaySegue account

Step 01

Sign up

Start by creating your PaySegue account.

Continue with Google is the fastest sign up method and will sync your email address and profile image (which you can later adjust and change).

It’s free to sign up. You aren’t charged any fees until your client pays you.

*PaySegue is in beta and currently supports USD only.

Stripe logo
Payments connected

Step 02

Connect your payments account

Your client pays through a secure payment processor that sends funds directly to your connected payout account.

This is a one-time setup using Stripe. It’s easy to complete and takes no more than a few minutes.

It matters because this is where your client’s payment goes securely. Your connected account is tied to your payout destination.

PaySegue brings you back afterward so you can keep working.

Step 03

Click “New invoice”

Every invoice starts here. Once payments are connected, you can move straight from your dashboard into a fresh draft.

Demo
PaySegue invoice editor with customer details, line items, payment terms, and client note fields visible.PaySegue invoice editor summary section.
Scroll

Step 04

Fill out the invoice

Add the title, your client’s name and email address, line items, when it’s due, internal notes, and notes for the client.

If it’s useful for your business, you can add an optional project name and reference number, fees, taxes, discounts, and choose which business details appear on the invoice, such as your logo and contact information.

You can save it as a template, so when you return to bill your client again, you can work from the previous invoice by selecting the template’s title from a dropdown menu.

Everything on PaySegue, including the invoice creator, is supported on both desktop and mobile devices.

A summary of the billing details is shown on the right side of the editor or beneath it and updates and recalculates as you type.

Step 05

Preview before sending

Before anything goes out, you can review exactly what your client will see. This gives you an opportunity to do a spot check between editing and sending.

Step 06

Send the link

When you press send, your client receives an email with a link, notifying them to review and pay the invoice. They do not need a PaySegue account to open and pay.

Customer: invoice notification

Subject: Invoice 2048 for Homepage refresh — $850.00

Demo invoice email

This is a demo preview. On a real invoice, this button takes your client into Stripe to review and pay securely.

Draft
Sent
Viewed
Paid

Step 07

Wait for your client to pay

While you wait, PaySegue keeps the status trail clear: sent, viewed, paid, failed, refunded, and notifies you once payment is complete, as well as if there is a problem.

That makes follow-up easier and cuts down on any guesswork.

Step 08

Receive a payment confirmation

When your client pays successfully, you receive a confirmation email with the payment details and a link back to the record.

That gives you a clear handoff from waiting on payment to knowing it has been completed.

From: Casey Bennett

Subject: Invoice paid: Homepage refresh

$

Step 09

Wait for payout

Your first live payout may take longer than subsequent payouts. Stripe typically schedules the initial payout 7–14 days after the first successful live payment, depending on country and risk review.

After that, funds arrive according to the connected account’s payout schedule, which varies by country, bank, and payout settings. For many US accounts on standard timing, funds are typically available within about 2 business days.

Read Stripe’s payout help articles for more details

Dizzy symbol

Step 10

Congratulations

That’s the full loop. You did the work, sent the invoice, received the payment, and now you can get back to your next task.

Toolbox

Step 11

Explore more features

After your first payment, you can keep going with the rest of the workflow: bill the same and new clients again, download logs and metadata for your records, create templates, sync contacts, and explore more as new tools are added.

Envelope

Step 12

Send feedback

Feedback is actively welcome. If something feels confusing or you want to tell us what worked well, email support@paysegue.com.

Start simple and build confidence from the first invoice

If the flow above feels like the right fit, create your account and try it with your own business details.